

Billing area gathers the workspace’s financial information: plan status, trial, usage, wallet, auto-recharge, invoices, payment portal, and spending limits.
Use Console > Billing for workspace billing operations.
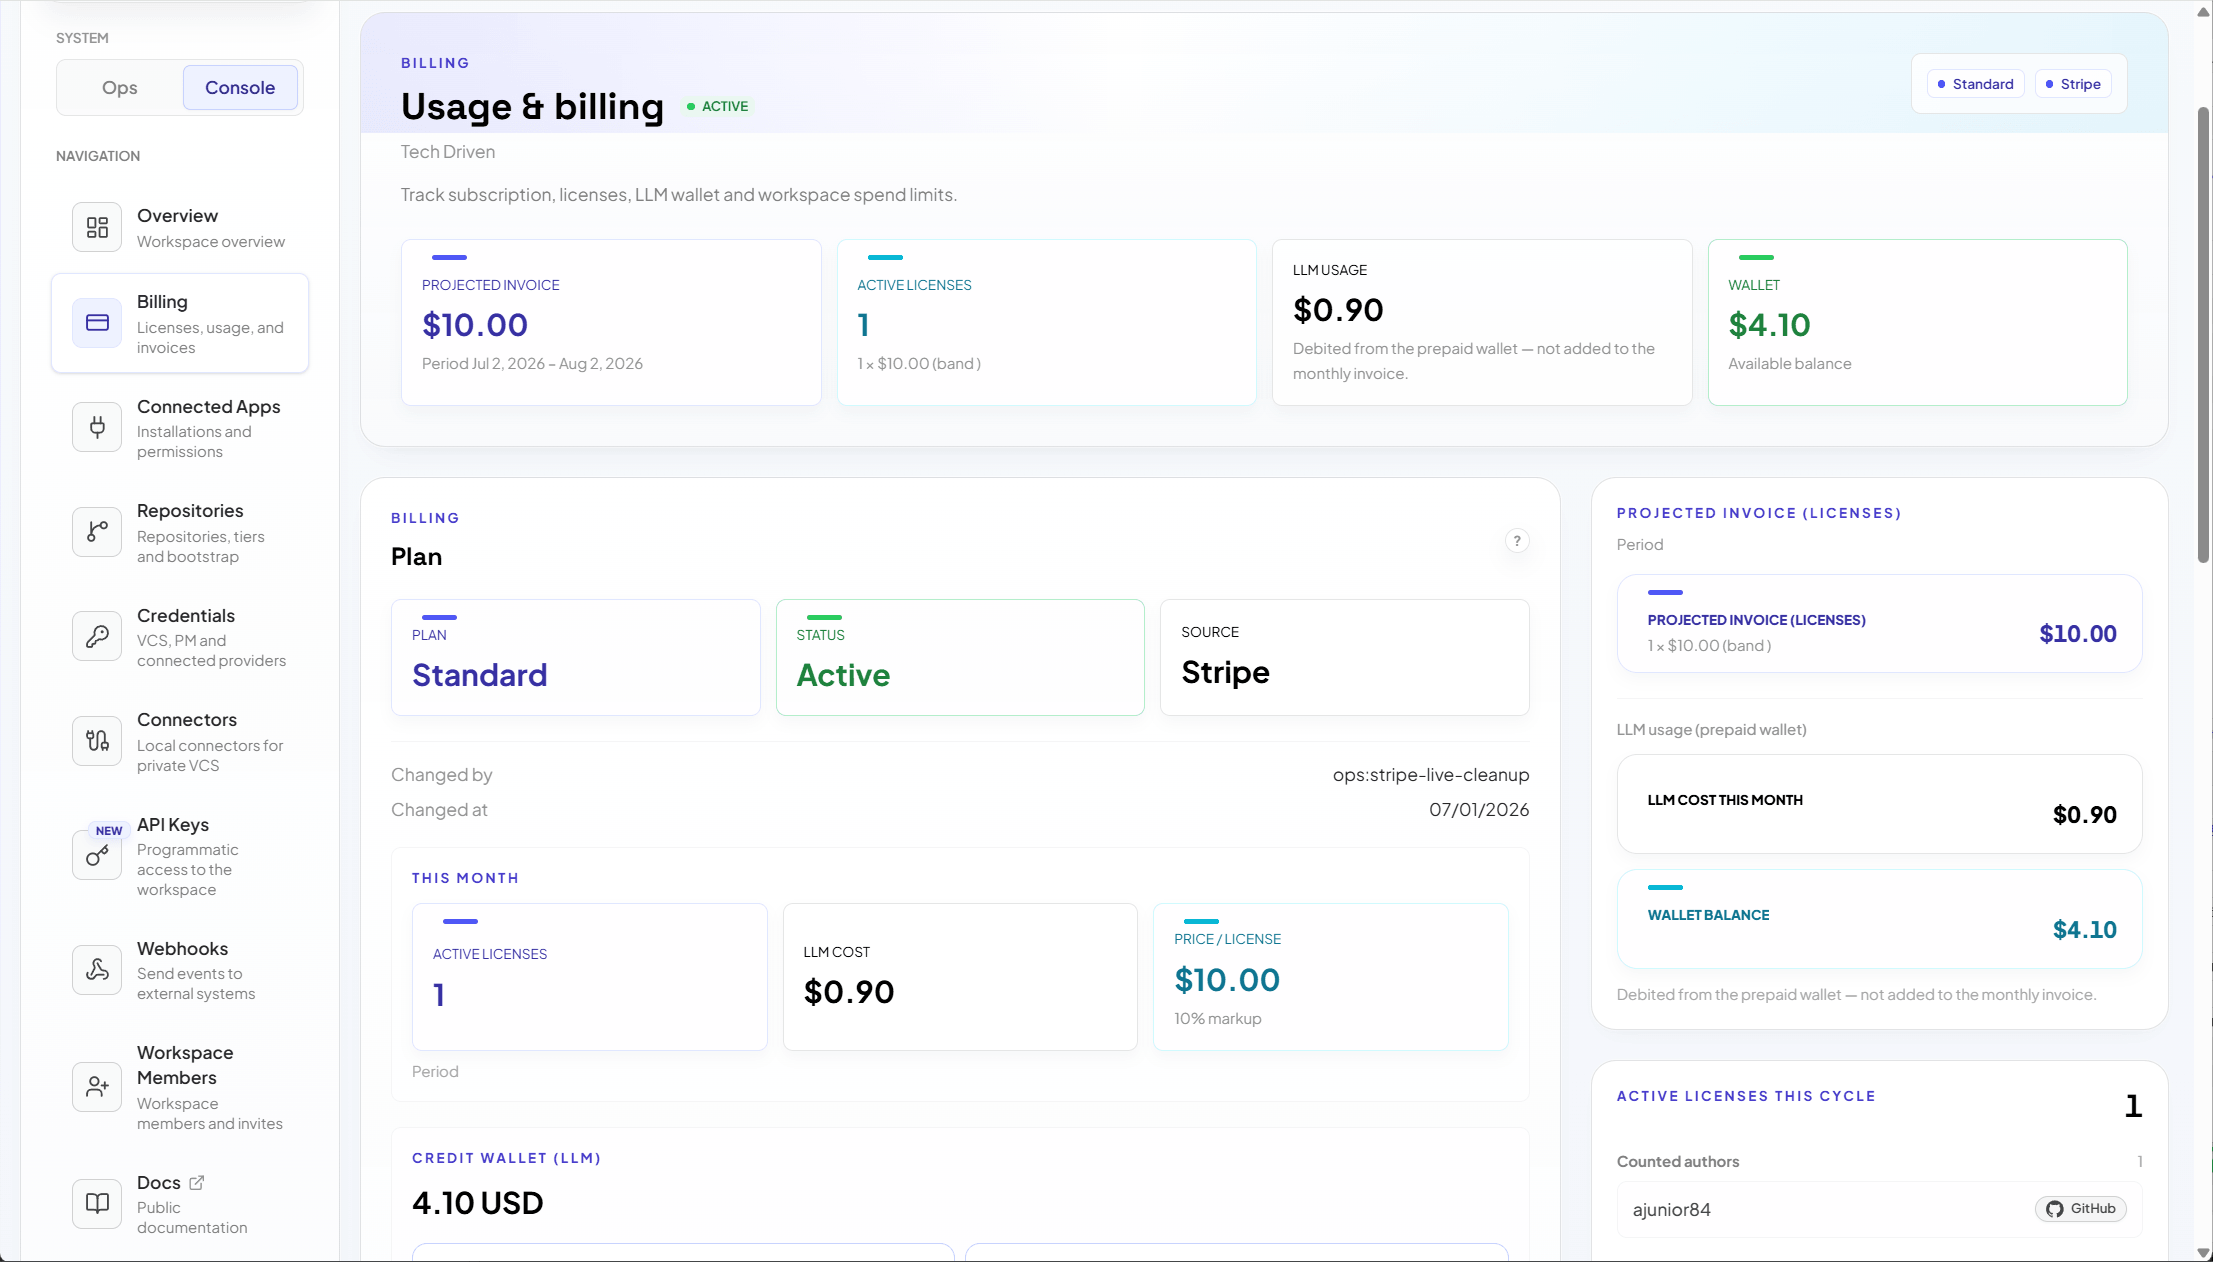
Who can access
Billing is available to two roles:- Workspace admin: full access to billing, including the trial, wallet, auto-recharge, and spend cap.
- Billing Manager: manages billing without administering technical settings.
Billing overview
The screen can show:- current plan and subscription status;
- active or ended trial;
- monthly usage;
- active seats;
- consumption associated with reviews;
- wallet balance;
- auto-recharge settings;
- invoices and receipts;
- payment portal;
- spend cap;
- financial pending items.
Plan
The plan section shows your current plan and subscription status. Acrity provisions and changes plans for your workspace, so a plan selector is not part of self-serve billing.To start a new plan, upgrade, downgrade, or change plan terms, contact Acrity. Plan changes are handled by Acrity, not from this screen.
- Start 14-day trial — begin the trial when it is available (see Trial).
- Subscribe — activate a paid subscription for the plan Acrity has provisioned.
- Manage payment — open the Stripe billing portal to update the payment method, view invoices, and manage billing details.
- Cancel trial or Cancel plan — end the trial or the active subscription according to the displayed options.
- Resubscribe — restart a subscription after it was canceled.
- Resolve & reactivate — clear a payment or financial pending item and reactivate a suspended or past-due workspace.
Trial
The trial lets you evaluate Acrity before subscribing. Trial specifications:- Length: 14 days.
- Usage caps apply for the duration of the trial.
- One trial per workspace owner.
- track usage against the trial caps;
- invite only the users you need;
- connect representative repositories;
- validate your review policies;
- subscribe before the trial ends if you want continuity.
Wallet
The wallet holds the balance used for billed resources in your workspace. Use the wallet section to:- view the balance;
- add a manual top-up;
- configure auto-recharge;
- review the ledger;
- track payment pending items.
Manual top-up
1
Open billing
Go to
Console > Billing.2
Find wallet
Open the balance or top-up section.
3
Choose amount
Select an available option or enter an amount when the screen allows it.
4
Preview
Review the currency, amount, fees, and displayed total.
5
Confirm
Confirm the top-up and follow the payment flow.
Auto-recharge
Auto-recharge adds credit automatically when your balance runs low, so reviews are not interrupted by an insufficient balance. Configure these settings:
Also set the payment method and assign an owner to monitor failed recharges.
Spend cap
The spend cap sets a hard limit on how much your workspace can spend. Use it when:- you want predictable spend;
- a team is evaluating Acrity;
- you have a defined monthly budget;
- a temporary workspace needs a hard limit.
Ledger and history
The ledger records every change to your wallet balance. Use it to review:- credits;
- debits;
- top-ups;
- charges;
- adjustments;
- the usage period;
- associated receipts or invoices.
Common issues
Best practices
- Assign one financial owner per workspace.
- Use the Billing Manager role to separate billing from Workspace admin duties.
- Review spend monthly.
- Set a spend cap for test environments.
- Enable auto-recharge only with a controlled payment method.
- Keep invoices and receipts per your organization’s accounting process.